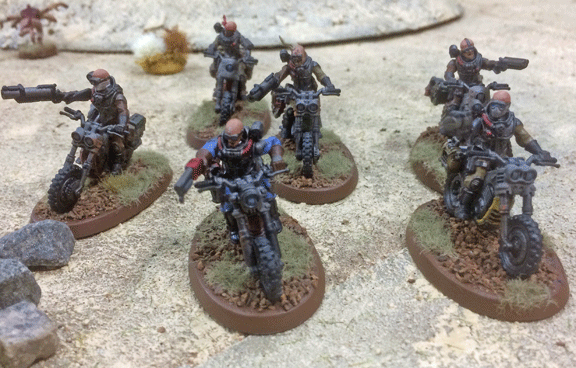
Mutant bikers, known as Atalan Jackals, swept across the sand dunes to target the Skitarii Rangers who had seized an objective on the west side of the central mesas. Their shotguns played a key role in annihilating the Mechanicus troops.
+ + Tactical algorithm subprogram N376-Y3, lower left cerebral cortex, Dominus Algo + +
Casualty rates are 12.5 percent below optimal.
Skitarii Rangers are approximately 200 meters beyond advisable deployment zones.
Enemy fire is at 45.2 percent effectiveness.
Conclusion: There is a 37.8 percent possibility that tactical objectives will not be achieved.
+ + End Analysis + +

Two Amiger Helverins face off against a mutant tank for control of an objective.
Final Blows
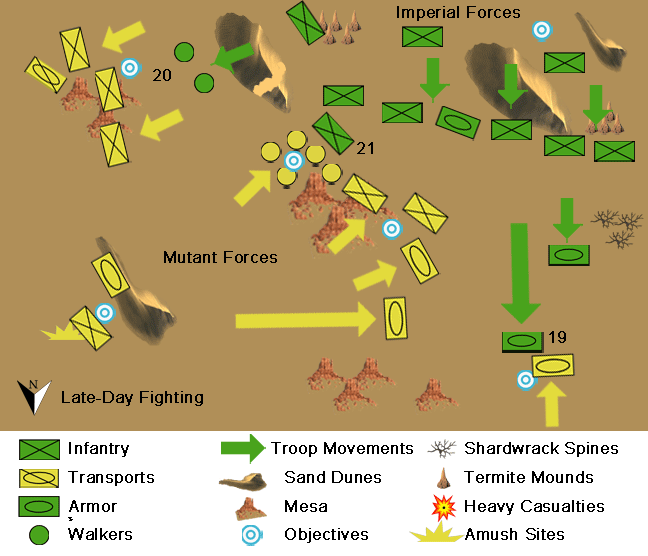
The sun was beginning to set, and Dominus Aleph-1 made one final effort to win the day. His two Amiger Helvins strode north along the west flank, striking out at an objective in the distance. Alas, a mutant tank emerged to contest their advance, and the two forces exchanged fire until nightfall. (19)
To the east, the Kastallan Robots advanced over the sand dunes and toward another objective, Through liberal use of their flamers, the automatons drove back hundreds of mutants, but they also failed to reach their goal before the sun set. (20)
With the Skitarii dead near the central mesas, the last hope of the Imperials was that the grenadier PDF troops could contest the objective on the west side of the mesas. ( 21) Alas, the advancing mutant walkers had blocked these elite troops from getting into range.

Alas, it was not to be. Not even the squads’ heavy flamers could drive back the mutant walkers that had surrounded the objective, and the grenadiers could not even get close enough to contest it.
The mutant line had held.
Click here to return to the beginning of the battle.
Click here to return to Part 2 of the battle.
—
Scenario: The Relic (Mission 6 of the 7th Edition rule book)
Imperial Victory Points: One objective = 4 v.p.; First Blood = 1 v.p., Linebreaker = 1 v.p., Slay the Warlord = 1 v.p. Total: 7 v.p.
Mutant Victory Points: 4 objectives of varying value = 9 v.p., Linebreaker = 1 v.p. Total: 10 v.p.
Mutant Victory!
—
TheGM: The mutants have won four battles in a row, and things are looking bad for the Imperials. There’s only one more battle to fight for control of the Thar Desert Basin.
So what were the highlights of the fight?
As some readers may know, I play the mutants using the Genestealer Cult codex, and their Cult Ambush rule is horrifyingly effective. This allows the mutants to bring troops from reserve and place right them in the middle of the Imperial army.
As I was playing both sides, I put on my Imperial command hat and decided to anchor my army in the corner of the table. This would force the mutants to deploy only to my front and right.
The problem with this tactic was that I could not leave my deployment zone until at least Turn 3, when most of the mutant reserves would be forced to come onto the table. That meant I had only a few turns to rush forward to seize as many of the six objectives as possible.
I also had a problem making maximum use of my firepower. For a number of turns, the mutants stayed out of sight, and my costly weapons were silent. When the mutants did finally appear to challenge the Imperials, there just weren’t enough turns to blast the mutants out of the way.
Still, by not exposing two flanks (left and rear), I was able to keep the mutants from showing up in the middle of my army and causing excess casualties. So, in that sense, the Imperials did maintain a solid formation that didn’t collapse as in past battles.
Still. the Cult Ambush rules are a powerful and effective way to put troops right where you want them. It makes my mutant army a real pain to fight.

The battlefield before the combatants arrived. The desert around the Azari Oasis is dotted with tall sand dunes and limestone mesas, with patches of Shardwrack Spines and sand pillars created by deadly Sandbore Worms.
For the mutants, the game almost was lost when all (and I mean ALL) the mutants rolled to deploy on Turn 2. Not willing to deploy from reserves right in front of the enemy firing line, I (donning my mutant command hat) opted to conduct a Cult Ambush behind cover. But that left me poorly positioned.
What saved the day was the Return to the Shadows rule, which allowed me to remove these mutant mobs back into reserve. That allowed me, on Turn 4, to try again—when the Imperials were more spread out, and I could ambush their flanks and rear.
The mutants also were lucky. The Dunestrider was taken out by some very lucky shooting dice. If it had survived, the Skitarii would have contested a 3 v.p. objective, and the game would have ended a tie.
What a great campaign this is proving. The games have been amazingly fun.
—
The Corvus Cluster is a Warhammer 40K blog documenting our gaming adventures in the fantastical sci-fi universe of Games Workshop.
Categories: Morkai Campaign
