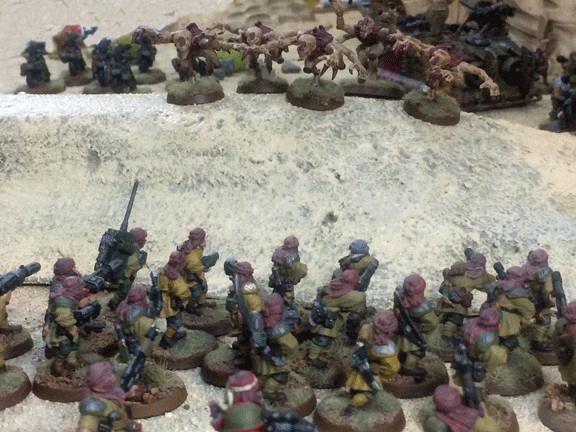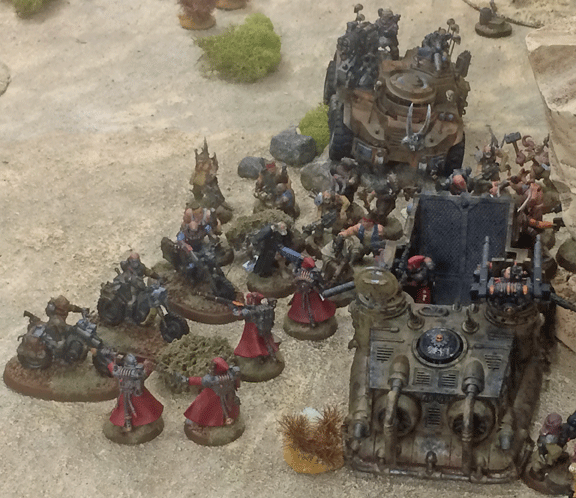
A firing line of PDF support troops prepare to fire a volley at hideously deformed mutants with multiple arms and massive jaws. Praise the Emperor, the PDF, with support from a nearby Onager, managed to stop the heretics’ charge.
“The Haruspex has promised us liberation. But we must earn it. Forward my brothers. Kill the Imperials. Take their blood. And if you die in doing so, then know you will be remembered for your sacrifice. Forward!“— Chakir Suleiman, warlord of the mutant army of Ungolath
Mutants Advance
Stymied by the tightly packed formation of Imperial troops, which prevented the mutants from conducting ambushes against their foes, the mutant leader had no choice but to send his troops forward to challenge the Imperial advance.
On the east flank, the advancing mutant transports stopped by an undefended objective and disembarked a large mob of infantry. (6)
These were soon reinforced by the mutants retreating from the nearby sand dune, where Kastellan Robots appeared to spray the dune with heavy flamers. (7)
To their south, a decrepit-looking truck, armed with four assault cannon, took long-range shots at the advancing Imperials, while the surviving Ridgerunner abandoned its wrecked partner and raced across the desert toward the opposite side of the battlefield. (8)

All across the battlefield, the roar of cannons and heavy weaponry began to rise in volume as both sides sought to target their opponent’s vehicles. An Onager managed to blow up a mutant supply vehicle, while a mutant tank struck an Imperial Chimera with an autocannon shell (the shell bounced off the transport’s armor without detonating).
Imperial troops were advancing, but cautiously, as ordered by the meticulously detailed battle plan developed by Dominos Aleph-1. But, even as his plan appeared to be working, the Tech Priest recognized that his troops needed to pick up the pace—or the sun would set before he achieved his objectives.
Thus, he ordered two squadrons of transports carrying elite troops to risk racing ahead of the rest of the army and seizing two objectives to his front..
This decision would define the rest of the battle. A squadron of Duneriders was directed toward an objective to the west of the central mesas (9,) and a trio of Chimeras was sent toward an objective on the northeastern side of the same mesas. (10)
In addition, two Amiger Helverins and a Lemon Russ tank were ordered to push deep into the mutants’ west flank to gain control of a third objective. (11)

The crisis of the battle arose when the mutant warlord sprung an ambush behind the transports that had raced forward. Although cut off, the crossfire of the disembarking Skitarii and elite grenadier PDF troops, coupled with fire from the nearby front line of the Imperial army, led to a slaughter of the mutants.
Battle of the Mesas
Both squadrons of transports reached their objectives, but the mutants chose to commit everything to contesting this Imperial effort.
On the west side of the mesas, militarized Goliath industrial trucks raced around the southern end of the mesas and then turedn north to spray the Duneriders with industrialized flamers. This armored force was followed up by several mobs of mutants, including some large and clearly deformed creatures that appeared to serve as assault troops. (12)
In addition, a sizable force of mutants appeared out of the sand directly in front of the command squad of Dominus Aleph-1. Led by the mutant warlord, a psyker, and a large mutant carrying a heretical banner, the mob of mutants targeted—but failed to kill—the Imperial leader.(13)

Mutant troops and vehicles took full advantage of the battlefield’s limestone mesas to maneuver safely.
Nearby, a large group of hideously deformed mutants—with elongated heads and four to six arms that ended in claws—attempted to charge the main Imperial line. Thankfully, a nearby Onager and laser cannon crew shot down the mutant scum before they closed into melee range. (14)
To the east, five armored walkers advanced to challenge the Chimeras seeking to seize the other objective near the central mesas. (15)
As enemy troops began to encircle both groups of isolated transports, the Imperial vehicles began to suffer losses. The Chimeras came under fire from the mutant walkers and several tanks firing from a hull-down position along a sand dune.
The Chimeras were destroyed, forcing the grenadier PDF troops to disembark. (16)
Meanwhile, the Duneriders also suffered from mutant tank fire, as well as surprisingly effect heavy stubber fire from the Goliath trucks. With flames rising from the underbellies of the transports, the embarked Skitarii Rangers were forced to disembark—and confront an ambush by Atalan Jackals, an elite force of desert bikers. (17)

Confronted by a convergence of mutant infantry, Goliath industrial trucks armed with heavy flamers, and the mutants’ elite Atalan Jackals, the Skitarii Rangers fell bravely in the service of the Omnissiah.
Heavy Casualties
The battle was truly joined at this point, and casualties mounted quickly.
On the west flank, a mob of mutants attempted to assault an Amiger, only to be slaughtered by the giant walker.(18) Alongside the burning Duneriders, the Skitarii fired volley after volley at the line of charging mutants, destroying more of the larger, significantly deformed mutants.
Yet the number of less-mutated heretics seemed endless, and they continued to charge at the Skitarii. Finally, the augmented Mechanicus warriors fell, and their objective was claimed by the heretics. (19)
With their Chimeras destroyed, and no weapons capable of stopping the mob of heavy walkers descending upon them, the grenadiers to the northeast withdrew and took out their frustration on the mob of mutants led by their warlord.
Wielding heavy flamers, the grenadiers bathed countless heretics with holy promethium until the mutant scum routed. It was reported that the warlord was wounded in the fighting, but the grenadiers were unable to prevent him from making his escape. (13)
Click here to read the conclusion of this battle.
Click here to return to the battle’s start.
—
The Corvus Cluster is a Warhammer 40K blog documenting our gaming adventures in the fantastical sci-fi universe of Games Workshop.
Categories: Morkai Campaign
