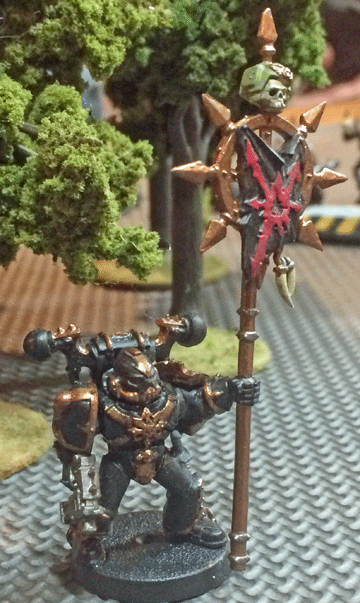
Two loyalist Marines hold the refinery against the ferocious Warp energies cast by the Chaos sorcerer.
It pained Brother-Chaplain Tauran to watch Tactical Squad Alpha suffer the onslaught of witchfire cast by the traitor sorcerer. How he wanted to charge the traitor and bring him the Emperor’s justice.
But his duty demanded otherwise. If he could just seize the control monitors for the refinery, the traitors’ assault would be stymied—and victory would belong to the Knights. The brother-chaplain grimly advanced.
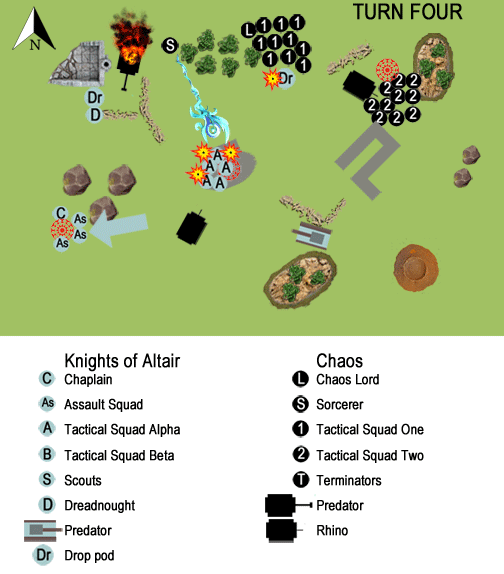
Imperial Turn Four
 The sun is moving quickly toward the horizon, and the loyalist Marines realize that they must hold key locations on the battlefield.
Tactical Squad Alpha already has seized the refinery tower, and there are no loyalist troops available to challenge the traitors on the east flank. So, the Assault Squad races to the southeast, behind a series of rock mesas where a key piece of technology is positioned. This is now their objective.
There are no other loyalist Marines still living on the battlefield. To the rear, the Predator targets the Chaos Rhino near the eastern objective but fails to do any damage. Meanwhile, mighty Boras seeks a new target for his wrath, as the traitor Predator has exploded from the witchfire that the dreadnought has barely survived.
Chaos Turn Four

The Chaos sorcerer nearly won the battle for the traitors single-handedly.
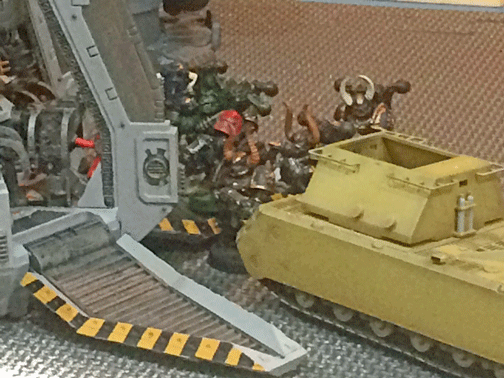
The morale of the traitors begins to crack. The tactical squad attacking the drop pod realizes that they lack the weaponry to destroy the armored transport. Yet, consumed with frustration, they ignore the tactical situation on the battlefield and continue their pointless attack.
To the east, the second tactical squad deploys in a defensive position around its captured objective. This squad, at least, has accomplished its mission.
To the west, only the sorcerer stands. Yet he is the most deadly of the traitor Marines, and now he turns his attention to Squad Alpha on the refinery tower. If he can destroy them, he may turn the tide of the battle.
He is unsuccessful. Although his witchfire kills three loyalist Marines, the two survivors are determined to hold. They stand their ground.
Imperial Turn Five
 The surviving loyalist Marines hunker down to hold their objectives.
The loyalist Predator, with no target worthy of it lascannon, moves at reckless speed across the battlefield toward the objective on the east flank. Perhaps the tank can distract the traitors and divert their fire from the refinery.
Also, if the battle lasts any longer, there is a chance the tank can contest the objective held by the traitors.
It is hoped the battle ends soon. Mighty Boras, weakened by the traitor witchfire, finds himself unable to advance on the sorcerer whom he wishes to crush beneath his armored bulk.
Chaos Turn Five

The landing site of Squad Beta’s drop pod proved a great distraction for these Chaos warriors.
Dusk arrives, and the traitor Astartes concede the battlefield to the loyalists.
Only two Marines hold the refinery tower, and four stand at the objective in the southeast corner of the battlefield. These are all that remain, and although the loyalists have held by the slimmest of margins, they praise the Emperor for their slim victory.
Before darkness blankets the battlefield, a team of Tech Priests and servitors arrive to drag the battle-damaged Boras behind Imperial lines. The ancient dreadnought survives to continue his service to the Emperor.
Imperial Victory Points: Two objectives (6 v.p.), First Blood! (1 v.p.), and Linebreaker (1 v.p.) = 8 v.p.
Chaos Victory Points: One objective (3 v.p.)
Imperial Victory!
Click here to return to the battle’s beginning.
Click here read Part 2 of the battle.
—
TheGM: As our first proper battle involving the forces of Chaos, It’s just as well that this game did not “count” for determining the fate of Dozaria.
First off, I read an older FAQ (7th Edition) that suggested drop pod doors interfere with movement (units cannot come within 1” of a enemy unit unless they charge). But, at The Gaffer’s request, I did some more research halfway through the battle and found a later FAQ that changed the rule. ie. Drop pod doors do NOT block enemy movement.
Well, The Gaffer didn’t want to change the rules halfway through the game, so he took the hit on that. But that decision did mean that his tactical squad was going to be slowed by the drop pod, and he decided it wasn’t going to be a revelant part of the fight.
At the same time, although Chaos still had a shot at winning, we had limited time to play. So, when our time ran out, The Gaffer graciously gave me the win.
Doesn’t matter. As The Gaffer puts it, we “saw how the monster works,” and we learned that Chaos Marines are scary. Chaos sorcerer are very, very scary.
This is only our second engagement on the Chaos-plagued world of Dozaria. Our first was a Shadow War fight between a handful of Plague Marines and Space Marines. This battle was our first small, but full-fledged Warhammer 40K fight.
I suspect this military front is going to see more action in the future.
—
The Corvus Cluster is a Warhammer 40K blog documenting our gaming adventures in the fantastical universe of Games Workshop.
Categories: Battle Report (Tabletop), Dozaria Campaign
