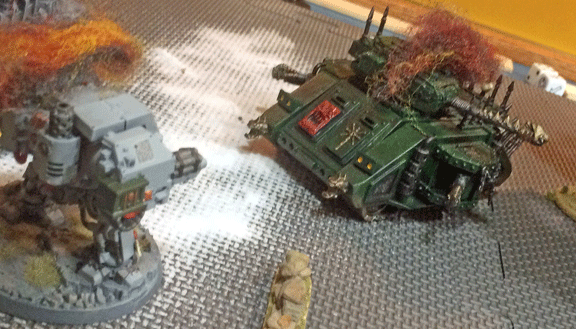
Ancient Boras and the Chaos Predator target one another at point-blank range.
Deep in enemy territory, the dreadnought strides toward the traitor Predator tank. Lascannon beams and witchfire slam into his armor, and Boras can feel the sickly taint of the Warp. The cogitators that connect his withered body to his armored shell register weakening energy readings in the mechanism that allows him to move.
This will not do! He is the mighty Boras, scourge of traitors, heretics, and xenos, and he will not allow himself to be defeated. Calling upon all the hate and anger within him, he uses his mind to force his struggling armored form to move forward.
He forces his metal arm to raise his melta gun yet again and fires at the traitor vehicle.
Imperial Turn Two
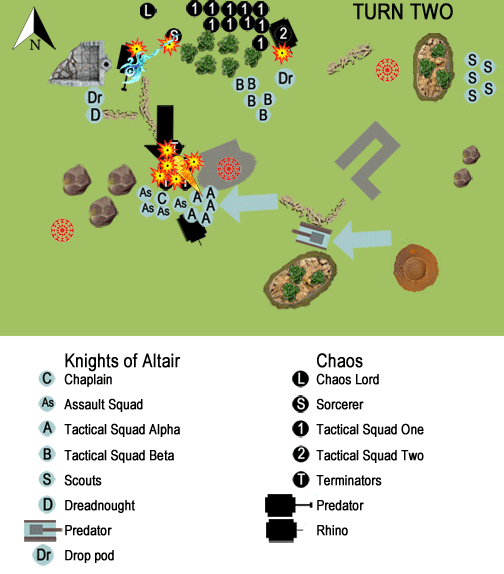
 For the Knights, nothing is more dangerous than the Terminators. Every unit in the loyalist force targets the traitor unit.
It literally takes every bolt gun, flamer, lascannon, heavy bolter, and Boras’ stormbolter to thin the Terminator Squad. Even Tactical Squad Beta, which lands by drop pod to the northeast of the refinery, targets its limited long-range fire at the enemy.
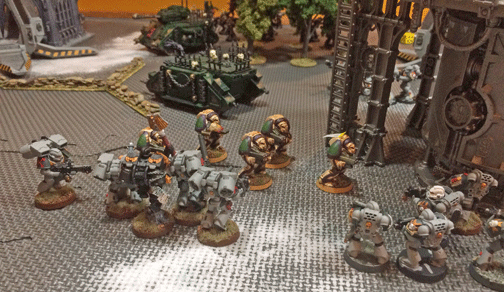
Three Terminators fall, but even just two survivors are a threat. So, both squads charge the traitors. Led by Brother-Chaplain Tauran, a vicious melee follows, but the Terminators are finally brought down.
One member of the Assault Squad is slain as well, but the Knights of Altair claim First Blood!
Chaos Turn Two

It requires the firepower of the entire Knights’ army, followed by a charge of two squads, to destroy the Chaos Terminators.
The mighty Boras continues to dominate the attention of the traitor Astartes. The Predator targets the dreadnought once again, but its lascannon again misses.
The sorcerer casts his Corrosion spell once again, but it is miscast. Both the Predator and the sorcerer himself are caught within its Warp-tainted magic, and both feel their strength drained.
With the Terminators destroyed, the Chaos Rhino by the refinery attempts a desperate tactic: It “tank shocks,” recklessly charging through the Marine lines at the refinery. It accomplishes little: the Marines nimbly move aside and allow the transport to race past them.
The traitors behind the woods move farther east, targeting the newly landed drop pod. Fired upon by the vehicle’s stormbolter, the traitors are distracted from the main battle and attempt to destroy the offending drop pod with bolt gun and power sword
They accomplish little.
(TheGM: By mistake, we ruled the drop pod doors blocked movement. We found a revised FAQ that proved that wrong, but our discovery was too late to affect this battle.)
On the east flank, the crew of the second Rhino shakes off the effects of Turn One’s attack. The vehicle accelerates and advances toward the loyalist scouts that threaten to seize the objective on that side of the battlefield.
Imperial Turn Three
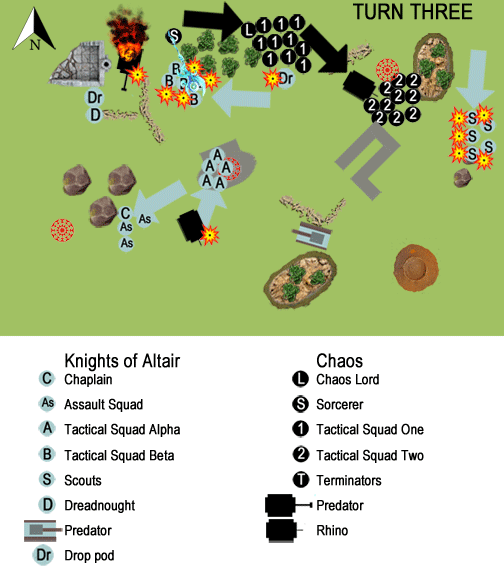
 With the Terminators dead, the loyalists focus on the Chaos Predator and sorcerer. Ancient Boras fires at the traitor tank but only manages a glancing hit. Tactical Squad Beta advances toward the sorcerer but opts to fire its melta gun at the Predator. Alas, it fails to damage the tank.
Recognizing that objectives must be held, Tactical Squad Alpha climbs the refinery tower and sets up a firing line to defend their position. The Assault Squad withdraws, heading to the objective in the southwest corner of the battlefield.
To the east, the scouts recognize that they cannot stand against a full tactical squad of traitors in power armor. They run toward their own deployment zone, hoping to draw the traitor into a pointless chase, but the scouts make little progress as they stumble over rough ground.
With few targets in range, the loyalist Predator targets the Rhino chasing the scouts but fails to hit.
Chaos Turn Three

Chaos Marines disembark on the eastern edge of the battlefield and annihilate the Knight scouts.
Determined to stop Boras, the sorcerer casts Doom Bolt. But the powers of the Warp are fickle, ad the spell goes awry. The spell strikes the Chaos Predator, destroying it, but also wounding Boras and killing a loyalist Marine standing near the Predator.
Frustrated, the sorcerer casts a second spell, a Firestorm, and its power wipes out Tactical Squad Beta to the last man.
To the east, the traitor Astartes also manage to draw blood. Disembarking from their Rhino, the traitor squad targets and shoots down the fleeing scouts. One objective falls to Chaos.
Click here to read the battle’s conclusion.
Click here to return to Part 1 of the battle.
—
The Corvus Cluster is a Warhammer 40K blog documenting our gaming adventures in the fantastical sci-fi universe of Games Workshop.
Categories: Battle Report (Tabletop), Dozaria Campaign
