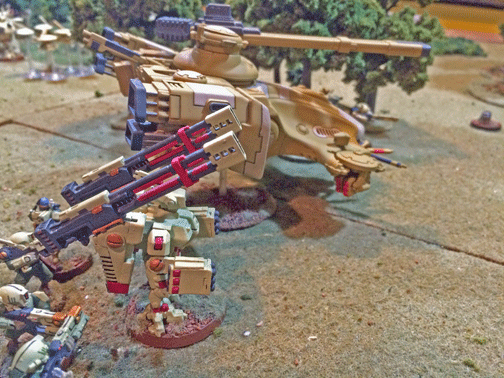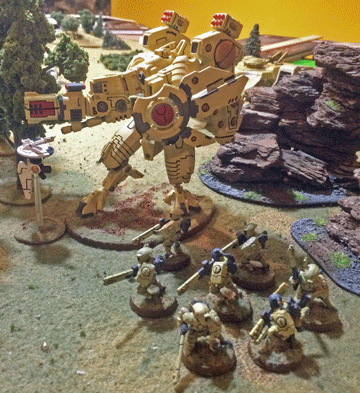
Tau Hammerhead tanks and Riptides took a heavy toll on the armored vehicles of the Knights of Altair.
“As the fighting continued, the Knights of Altair realized that the tactics they’d honed against Hegira’s orks were not appropriate for the more technologically advanced Tau. It took time, but the Astartes realized that they didn’t need flamers. They were not fighting a mindless horde. They needed melta guns to punch through the heavily armored xenophobic battle suits.”—Chronicle of the Tau invasion of Dar Sai, published 753.M41.
Tau vs. Knights of Altair – Second Clash
3 601 738.M41
A week days after their first clash, the two forces met again. This time, the Knights of Altair did not race forward, surrendering the initiative to the Tau in hopes that the xenos would make known their intentions—and commit their reserves early.
The Tau did exactly that by advancing down their left flank with two Devilfish filled with Fire Warriors and the support of the Riptide known as Tō’kra.
When the Space Marines did join the fight, they concentrated on the Tau right flank, screening their armored assets with terrain, transports, and infantry—all in hopes of preventing a devastating Deep Strike by Crisis Suits that had proved so deadly in the first clash.
The tactic succeeded, as the Tau Crisis suits were unable to deploy as close to the Astartes armor as they’d hoped. Still, the xenos launched a spoiling attack with Crisis Suits and drone squadrons to slow down the Astartes’ advance.
As a result, Tō’kra and his accompanying Fire Warriors managed to seize key objectives on the undefended Imperial flank—and the Space Marines were unable to advance quickly enough to reach the Tau main line.
Outflanked, the Knights of Altair withdrew before suffering heavy casualties.
Scenario: Crusade
Space Marine Victory Points: One objective (3 v.p.), Slay the Warlord (1 v.p.), and Linebreaker (1 v.p.) = 5 v.p.
Tau Victory Points: Three objectives (9 v.p.) and First Blood (1 v.p.) = 10 v.p.
Tau Victory
Tau vs. Knights of Altair – Third Clash

To prevent Tau Crisis Suits from striking their rear, the Knights of Altair learned to concentrate their forces until the Tau committed their reserves.
3 621 738.M41
Despite having been pushed back more than 700 kilometers, the Knights of Altair were in no mood to assume a defensive stance against the xeno invaders. At first line, the Astartes commander, Brother-Chaplain Sévin, launched an aggressive counter-offensive against the xenos.
Four Drop Pods led the attack; two carrying dreadnoughts, two carrying tactical squads.
The dreadnoughts landed first and charged directly at the Tau Hammerheads and Riptides. In a matter of minutes, the powerful xeno tanks were out of action. Ancient Brother Gallus was put out of action by Tō’kra, but the Riptide was then charged by Boras, who kept the giant battle suit occupied in hand-to-hand combat for the rest of the battle.
Alas, deep-striking Crisis Suits landed once again on the flanks and rear of the advancing Astartes attack column, quickly destroying the vanguard of Vindicator and Predator tanks and forcing the Space Marine infantry to engage in a bloody if ultimately successful defensive action.
Although the Tau Crisis Suits were ultimately destroyed to driven back, the Knights’ advance was delayed fatally—long enough that the tactical squads dropped behind Tau lines were outnumbered and outgunned. The survivors were forced to withdraw, fighting their way to the main defensive line of the Astartes.
After some desultory fighting in the late afternoon, the Knights withdrew south yet again.
Scenario: The Emperor’s Will
Space Marine Victory Points: One objective (3 v.p.) and First Blood (1 v.p.) = 4 v.p.
Tau Victory Points: One objectives (3 v.p.), Slay the Warlord (1 v.p.), and Linebreaker Blood (1 v.p.) – 5 v.p.
Tau Victory
Tau vs. Knights of Altair – Final Clash
3 680 738.M41

Throughout the campaign, the Tau Riptide known as Tō’kra proved a formidable opponent.
Once again, the Knights of Altair opted for an aggressive assault. This time around, however, the Astartes re-equipped themselves with melta guns that would allow them to better fight the Tau Crisis Suits.
The commanding officer of the Knights, Brother-Chaplain Sévin vowed that his troops would stop the xeno advance—or die in the attempt.
Having honed their tactics over the campaign, the Knights were even more aggressive than normal. Four Drop Pods landed dreadnoughts and tactical squads behind Tau lines. This time, however, the Drop Pods landed in a tighter pattern, allowing the Dreadnoughts and tactical squads to better support one another, as well as make better use of the Drop Pods’ Storm Bolters.
The Tau use of deep-striking Crisis Suits was as predictable–and as effective–as before. However, equipped with meta guns instead of flamers, the Space Marines were able to destroy the Crisis Suits more quickly, allowing them to resume their advance and break into the Tau deployment zone.
Over the course of the battle, the Space Marines managed to stymie a Kroot flanking attack to seize one objective, while the Tau Riptide rushed the Space Marine flank and caused serious casualties with its Ion Accelerator.
Fortunately, one of the targets of the Riptide—an Assault Squad led by Brother-Chaplain Sévin—managed to rally sufficient survivors of the Riptide’s attack to charge the 10-meter-tall battle suit.
This proved critical. Although the Assault Squad had little hope of destroying the giant weapon system, it did manage to engage the Riptide in melee for the latter half of the day—allowing the rest of the Space Marine force to break through the Tau lines and seize the majority of its objectives.
At battle’s end, the Space Marines were triumphant, although at great cost: The Assault Squad was decimated, with only Brother-Chaplain Sévin still standing when the Riptide—later confirmed to have been Tō’kra—retreated with the rest of the Tau force.
Scenario: Crusade
Space Marine Victory Points: Two objectives (6 v.p.), Slay the Warlord (1 v.p.), First Blood (1 v.p.), Linebreaker = 9 v.p.
Tau Victory Points: One objective (3 v.p.) and Linebreaker (1 v.p.) = 4 v.p.
Space Marine Victory
Click here to return to Part 1 of this campaign.
TheGM: This four-battle mini campaign was the result of a week of solo gaming that allowed me to experiment with various unit/weapon/tactical combinations. I’ll be writing about the lessons I learned in the near future.
—
The Corvus Cluster is a Warhammer 40K blog documenting our gaming adventures in the fantastical sci-fi universe of Games Workshop.
Categories: Battle Report (Narrative), Dar Sai Campaign
