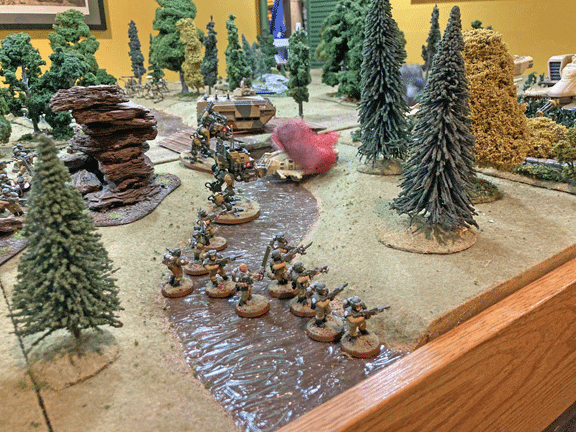
Guardsmen of 2nd Platoon cross a stream in their eagerness to close with the hated xenos. Their attack swept the defending Kroot from the field.
“The most dangerous thing on the battlefield is a junior officer with a compass and a map.“—Lady General Jenit Sulla
* * *
Continued from Part 1 . . .
Pressing our advantage
With the Tau’s light-armor assets in retreat, I decided to press home our advantage. I ordered our men to rush the enemy.
I must commend my troops for their courage. Without hesitation, they plunged into the stream and waded across under enemy fire, never hesitating in their duty. My three mortars shelled the enemy position and, as my troops advanced, kept their mortars falling approximately 50 meters ahead of the advancing line.
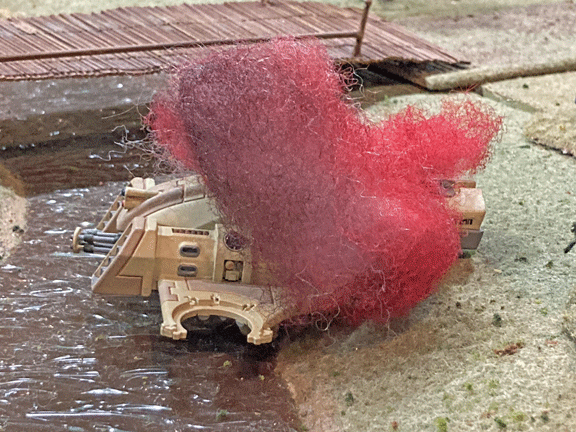
My chimera and two Sentinels also advanced, forcing the damaged skimmer to fall back to safety. The enemy Devilfish, positioned “hull down” behind a stone wall, attempted to use its weaponry to stem our advance. But a guardsmen in 1st Squad, armed with a plasma gun, managed to get on the xeno transport’s flank and strike a killing blow.

Tactical Note: The attack to the north proceeds successfully, while 3rd Squad, to the south, slowly withdraws, drawing the southern Kroot forward and distracting them from the fighting to the north.
The transport set afire, its escaping crew were shot as they exited the craft, and the supporting enemy infantry fled before us.
By this point, 3rd Squad on the left flank reported the approach of Kroot skirmishers, and I ordered that unit to open fire and then withdraw slowly—yet always with an eye to preventing this force from turning on our attacking column to the north.
Thankfully, the Kroot were rather undisciplined and, instead to supporting their allies on the north side of the road, they seemed intent on pursuing the squad to their front—typical behavior for a primitive predatory species. Thus, this force—equal to two Guard squads—did not playing a relevant role in the battle.

Tactical Note: As enemy resistance crumbles to the north, the majority of 2nd Platoon’s armored assets turns south to threaten the flank of the advancing Kroot. The xenos realize the battle is lost and disappear into the forest.
Enemy retreats
With the loss of their vehicles, the xenos appeared to have little weaponry left to counter my Chimera or Sentinels. For that reason, I put one armored Sentinel at the tip of my attacking troops and pushed the xenos back.
The 3rd Squad had done its job delaying the Kroots to the south, but the xenos were advancing to my flank. Thus, I ordered my Chimera and second Sentinel south, along with my command squad, and as the Kroot came within charge range of 3rd Squad, the xenos found themselves taking flank fire.
Soon enough, the xenos recognized their position was untenable and began to withdraw. The Kroot slinked back into the shadows of the forest and disappeared.

Supported by a Chimera and two armored Sentinels, 2nd Platoon quickly routs the xenos to the north of the trail.
Although one superior officer who later toured the battle reproached me for not pursuing the xenos, I stand behind my decision to halt my advance and allow the enemy to withdraw without challenge. The Kroot are exceptional forest troops, and it was unreasonable to assume that—if my advancing troops had lost cohesion as they advanced through the woods, my troops might have suffered catastrophic losses to an enemy counterattack.
Thus, I deployed in a tight-perimeter defense until a larger reconnaissance force arrived the next day and took command.

By the end of the battle, only the smoking hulks of the Tau armor—and a few corpses—remain of the xeno taint.
Conclusion
I would note the poor tactical decisions of the Tau commander. While his attempt at a single envelopment was sound, the execution of his attack was poor. He should have avoided contact with my main attack force—even giving ground if necessary—until the Kroot seeking to envelopment my flank had made contact with my troops.
Instead, he launched a piecemeal attack beginning with his skimmers and, after their repulse, attempted to hold his position. This allowed my full force to strike at half his force. Attacked by superior numbers, the enemy in the hamlet had no choice but to fall back—a withdrawal that gave me the opportunity to send troops south against the flanking Kroot.
As it was, the enemy flanking force withdrew without having any appreciable role in the fighting. Again, a piecemeal attack. It was an amateurish mistake by the Tau commander.
TheGM: I’ve always wanted to put the Kroot in the woods and see how they’d do in a fight, so I set up this platoon-sized force of 500 points. As Lt. Delmara noted, the Tau commander had a decent plan. It was simply poorly executed.
It was a solo game, so, as the Imperial commander, I pat myself on the back. As the Tau commander, I am justly chastened, and I will try to learn from my mistake.
Click here to return to Part 1 of the battle.
—
The Corvus Cluster is a Warhammer 40K blog documenting our gaming adventures in the fantastical sci-fi universe of Games Workshop.
Categories: Dar Sai Campaign
