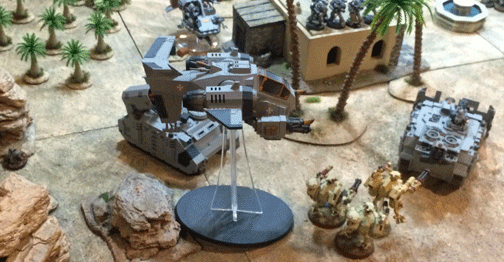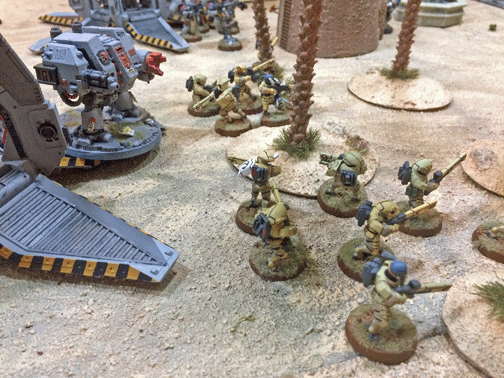
Outflanked, the Space Marines called for aerial support to deal with the threat of the suddenly arrived xeno battle suits.
Battle Rages
The fate of Sandhurst Oasis hung in the balance. The main force of Tau Fire Warriors were charging across the desert to seize the oasis. They are met by fierce fire from the tactical squads, but the number of Tau could not easily be stopped.
 One reason was that the Tau were attacking on so many fronts that the Space Marine fire was split. In the southeast, the Crisis Suit team in the shards finally broke free and targeted the nearby Assault Squad. Two Astartes were brought down.
Meanwhile, a swarm of drones dropped from the sky and opened up on the squad. Although they did no harm, the distracted the remaining assault marines long enough for a Broadside Broadside Battle Suit to stride out of cover of a sand dune, target the remaining Space Marines, and drop them with missile fire.
In the southwest corner of the battlefield, the Tau commander—now fighting alone—decided that retreat was not an option. For the Greater Good, he would do his utmost to take out the Space Marine tanks. He fired his jetpack and moved into a rock-strewn area with cover, then attempted to finally take out the Vindicator tank. He managed a glancing hit, but the well-armored tank survived yet again.
The Space Marines were determined, however, to bring down the Tau commander. Those deployed in the closest building rushed out and targeted the xeno, as did the nearby Predator. Boltgun rounds and lascannon fire pummeled the xeno’s fast-moving Crisis Suit and caused extensive damage to it. But the xeno survived . . . barely.

The presence of Ancient Boras behind the Tau lines attracted significant xeno resources away from their assault on the oasis.
To the Tau armor, it was obvious that, if the xenos could eliminate the Space Marine tanks, the Tau’s superior firepower would drive the humans out of the oasis. They again targeted the Vindicator, seeking to bring it down. Two Hammerhead tanks, a Skyray Missile Gunship, and a Riptide battle suit opened up, but even their combined fire could not destroy the human vehicle.
New fighting broke out to the north. As Sévin’s Assault Squad charged north, it ran into advancing Tau. A short melee followed, with the Assault Marines victorious and unharmed.
In the northwest, the fighting continued around the Razorback. The Crisis Suits killed two members of the Devastator Squad, and a Stealth Suit team landed and opened up on Marines as well.
The Devastators, and the twin-linked lascannon on the Razorback, opened up, wiping out the Crisis Suits. The Enginseer and his servitors took out two of the Stealth Suits. The final xeno was dispatched by Sévin, who roared down on the Tau battle suit with jetpack blazing. The xeno hardly knew what happened before he was crushed by the armored boot of the chaplain.
The northwest corner of the battlefield was finally secured.
Carnage and Glory
 In the final hour of the battle, the Tau armor lit up the sky with shellfire and ion beams. The Vindicator finally succumbed to the barrage and exploded.
That was the signal for a final push by the Tau Fire Warriors. With a roar, the entire host of xenos charged into the oasis, seeking to overwhelm the Space Marines by sheer numbers.
It is not to be. The Storm Talon had been strafing the Tau Crisis Suits in the southeast, but it slowed and risked destruction by anti-air fire to rake the xeno lines. Dozens of Tau were slaughtered by the gunship’s stormbolter and missile fire.
Still, the Tau pressed on. A Devilish reached the center of the small oasis village and disembarked a Breacher Squad. Meanwhile, dozens of Fire Warriors, along with three Piranha skimmers, crowded into the town as well.
The Space Marines rushed out of the surrounding buildings to confront the xenos in hand-to-hand combat. A melta shot took out the Devilfish, while a thrown krak grenades damaged one fo the Piranhas.
For much of the battle, the Terminators had been forgotten in the confusion. But, in reality, the elite Astartes had been positioning themselves where they could make a final charge.
The time had come, and when the Veteran Astartes ran around the corner of an alley and into the town square, the Tau Fire Warriors found themselves confronted with the most dangerous warriors in the galaxy. There was little they could do but die. Their pulse rifles proved ineffective against the heavy Terminator armor, and once the Terminators were amongst the xenos, many simply exploded as they were struck down by the Marines’ power fists.
With much of the Space Marines’ infantry concentrated at the tip of the Tau attack, the xenos’ plans were shattered within minutes. The Fire Warriors fled in defeat, shot down in the back by the outraged Marines.
Only a few side actions were still ongoing. Ancient Boras plowed into the retreating xenos, his servo-poweed fists sweeping through the crowd and crushing bodies by the dozens. This rampage fell under the eye of the Tau armor, which opened up to bring him down.
Despite being struck repeatedly by enemy fire, Boras was unstoppable.
The final action came int he southeast. Surrounded by Space Marines, his battle suit failing from extensive damage, the Tau commander ordered a retreat–only moments before he was struck down by a direct hit from the Predator’s lascannon. No remains of the xeno were left for dissection.

At day’s end, hand-to-hand fighting determined the fate of the oasis.
Aftermath
The fighting lasted only a few more minutes before the Tau disappeared into the desert. The Knights of Altair suffered few casualties. The crew of the Vindicator was killed, and 15 Space Marines were listed as casualties. The apothecaries thankfully reported that they’d been forced to remove the gene seeds from only four corpses.
In comparison, more than 200 xeno bodies and five vehicles littered the battlefield. It took only 20 minutes for the Astartes to identify and execute the xeno wounded. No pursuit was ordered, as the Astartes needed to return to their ship and continue on their original mission.
It is believed that the attack on the Sandhurst Oasis was an act of opportunity, the xenos having realized the weakness in the Imperial defenses and having decided to send what troops they could spare to exploit the undefended area. With the attack repulsed with heavy infantry losses (but, alas, no major armor losses), strategoes with the 728th Cadian Regiment concluded that the Tau would not weaken their sieges of Pradeep and Aruna to make a second attack.
A battalion of Dar Sai militia and a company of armor arrived three days after the battle to secure the oasis and allow the 4th Company to return to their strike cruiser. After a brief report to Captain Stevrous Stark, Brother-Chaplain Sévin and his Astartes departed for locations unknown.
Scenario: Self-designed, inspired by a very old White Dwarf article.
Space Marine Victory Points: Two objectives held (1 v.p. each), First Blood (1 v.p.), Slay the Warlord (1 v.p.) = 4 v.p.
Tau Victory Points: Two objectives held (1 v.p. each) = 2 v.p.
Click here to return to the battle’s beginning.
—
TheGM: This solo game taught me a number of lessons that I hope will improve my tactical play.
For one, the Tau attack was too divided. With my forces striking in all four corners of the battlefield, I had no way to support any of the attacks. Thankfully, the Space Marines responded to all the threats, and that made it difficult for them to respond effectively as well. (Although they ultimately were successful on most fronts.)
The true goal of the Tau was to take the town. As it was, I tried to defeat the enemy’s army. That tactic can work. But, as the Space Marines didn’t fold quickly, I didn’t have the time or resources to switch gears and go for the town with enough force to seize more objectives. I ran out of time, as well as troops.
The Space Marine commander can’t say they played well. Other than deciding to take hard cover in the buildings, I had no great plan. The Astartes’ tanks were scared of the Tau’s hull-down position, so I held them back in cover. The inevitable attack on the armor’s flanks by Crisis Suits could have quickly turned the tide in the xenos’ favor; without armor, the Space Marines were doomed. But the Tau die rolls were abysmal, and that ultimately was what saved the oasis for the Imperium.
One problem with playing 7th Edition (still preferable to 8th in my opinion) is that dreadnoughts are easily locked into melee. It’s not that Boras isn’t tough, but with few attacks a turn, he can be locked in melee the entire game—as long as his opponent is willing to sacrifice troops to keep him busy.
Still, it was a fun game, and it advanced the narrative of the war on Dar Sai. I’m thinking it’s time for a Battlefleet Gothic battle to see if the Tau can break the Imperial blockade and get more troops to Commander Swiftstrike (the senior Tau commander on Dar Sai).
—
The Corvus Cluster is a Warhammer 40K blog documenting our gaming adventures in the fantastical sci-fi universe of Games Workshop.
Categories: Battle Report (Narrative), Dar Sai Campaign

Woo!
Always love reading about the Tau, The Knights are certainly a plus as well. I quite like your custom chapter and think they’ve been cool really!
Hope to see more soon and hope your enjoying yourself dude!
LikeLike
Thanks for your kind words. We’re having a blast. With more than 300 posts, we’ve built up quite a backdrop for our games. I haven’t played a game that wasn’t part of our greater story in years, and the surprises keep coming. I highly recommend a narrative campaign, and i invite people to drop me a line to get involved. Over the years, I’ve partnered with two parallel campaigns around the world, although they’ve been kind of quiet lately.–TheGM
LikeLike