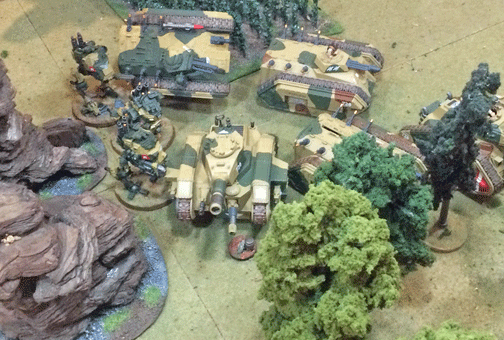
The commander of the 19th PDF Regiment sets up his headquarters at a farmhouse north of the Omao Plantation.
“As the campaign for Port Arena continued, it became apparent that the sprawling forests of Dar Sai were a major obstacle for Imperial forces. Although the 728th Cadian Regiment had an advantage in armor over the Tau, there simply wasn’t enough good tank country to fight in—and the xenos avoided such terrain like a plague.”—Chronicle of the Tau invasion of Dar Sai, published 753.M41
—
19th PDF Regiment mauled by Tau
3 068 739.M41
Dar Sai, Sculptor System
Corvus Cluster
Excerpt: Chronicle of the Tau Invasion of Dar Sai
The Imperial assault on Hawi Plantation had turned into a disappointing defeat. Only a single tank remained of the 3rd Armored Company, and the 4th Battalion of the 728th Cadian Regiment also had suffered heavy casualties. Only the 19th PDF Regiment, held in reserve, was still at relatively full strength, and so it was that this poorly trained unit was forced to man the front lines of the Imperial army.
On 3 068 739.M41, the 19th Regiment would be tested as never before.

The PDF commander chose a poor route of attack. The Tau quickly blocked passage through the rough terrain, leaving some of the PDF’s biggest guns unable to fire at a crucial moment in the fight.
It’s not clear how the Tau—only two days after a major battle—were capable of offensive action. It’s surmised that the Tau simply recognized that Imperial forces were vulnerable—and, even in their weakened state, an attack with tired troops immediately might prove more successful than an attack launched after both sides had licked their wounds.
In any case, just before dawn, the Tau attacked.
At first, the Tau advance appeared to be a demonstration. Only a handful of xeno tanks made themselves visible in the open meadows in front of the 19th’s deployment zone.
Hovering only a meter above the tall grass, the Hammerheads and Sky Ray tanks began to shell Imperial lines. With such a small force before it, the commander of the 19th ordered a counterattack, hoping to overwhelm the Tau vehicles with sheer numbers.

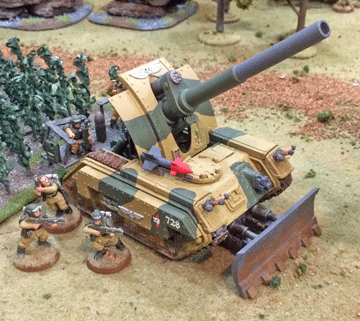
Artillery support played a pivotal role in keeping the PDF in the fight. One shell from this artillery piece wiped out an entire squad of Crisis Suits.
It was a decision that proved fatal. As the 19th sent forward its contingent of Lemon Russ tanks and Chimera armored transports, the vehicles advanced through a gap between a rock formation and copse of woods. This crated a traffic jam that forced the vehicles behind one another, and that meant most couldn’t fire.
One tank attempted to move around the other side of the woods, only to find itself blocked by a Devilfish that rammed the tank. Although the Devilish finally lost this encounter with the far-heavier Lemon Russ tank, the Tau vehicle’s aggressive stance so delayed the tank’s advance that it played almost no role in the battle’s outcome.
Death from the skies
With the Imperial armor committed, the Tau deployed their Crisis Suits and gun drones, which dropped from the sky. In a risky maneuver, they landed directly behind the armored column and quickly targeted the weaker rear armor of the vehicles. Two Chimeras and a Lemon Russ tank were destroyed in an instant, and two squads of troops were annihilated.
By mid-morning, a pair of Valkyries arrived overhead and provided air support. But, targeted by the marker lights of a Sky Ray, the aircraft were quickly shot down by the pulse rifles of more than 200 fire warriors.

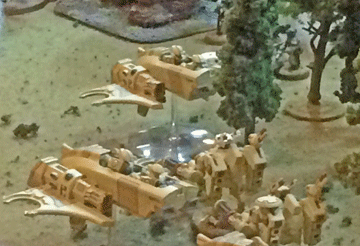
Piranha and Crisis Suits lead a flank attack on the 19th PDF Regiment. This attack finally broke the regiment, which fled south in disarray.
With the arrival of reserve troops and the point-blank fire of a Basilisk, many of the xeno Crisis Suits suits eventually were destroyed. But, by this time, a significant portion of the PDF’s infantry and armored reserves were gone.
Enemy in the rear
At this point, the Tau launched their final attack. A Squadron of Piranha raced across the battlefield and swung around the 19th’s flank. As the fast-moving skimmers raced through the regiment’s rear, firing on support troops, supply depots, and a key artillery battery, a general panic swept through the unit. Within 20 minutes, the entire PDF line collapsed as panicked soldiers fled.
This rout left what remained of the 4th Battalion and Captain Pax’s single Lemon Russ tank with little choice but to withdraw, although these units retained their combat cohesion and courageously fought a withdrawing action that gave ground quickly but allowed much of the Imperial force to escape destruction.
This difficult disengagement, closely pursued by the Tau, lasted five days. The Omao Plantation had to be surrendered without a fight, but the retreating Imperials finally limped back to the outskirts of Aruna and the city’s trench lines.
Although not yet besieged, the city found the enemy yet again at its doorstep.
Scenario: Crusade
Imperial Victory Points: Slay the Warlord (1 v.p.) + 1 objective (3 v.p.) = 4 v.p.
Tau Victory Points: First Blood (1 v.p.) + Linebreaker (1 v.p.) + 2 objectives (6 v.p.) = 8 victory points
Major Tau Victory!

The war on Dar Sai swings back and forth. After pushing the Imperial defenders to the outskirts of Aruna, the Imperial Guard pushed the xenos back almost to the Hawi Plantation. But now the Tau are approaching Aruna once again.
TheGM: With my troops already on the game table after my previous fight (Imperial drive on Hawi Plantation fails), I decided on a rematch. I used random die rolls to place the terrain.
This time, I mad a foolish mistake in the Imperial’s deployment. My idea was to advance up one table edge, limiting the ability of the Tau to Deep Strike on my flank. But I picked a spot where I again found myself after the first turn in a choke point. My tanks couldn’t fire!
Putting on my Tau hat, I didn’t hesitate. I took a chance and brought down my Tau Crisis Suits really close behind the Imperial Guard—and not a single Tau unit suffered a Deep Strike mishap.
Indeed. with pinpoint accuracy, my Crisis Suits landed exactly where they were needed—and they took a heavy look on the Imperial troops. My fusion blaster-equipped Crisis Suits blew up the transports and a tank, and my burst cannon-armed Crisis Suits and gun drones wiped out the troops that disembarked from these burning vehicles.
.By the time the last Lemon Russ tank managed to turn around and start shooting—well, with the help of a Basilisk, they wiped out the Crisis Suits, including the Tau warlord, but it was too late. The Imperials were shattered.
—
The Corvus Cluster is a Warhammer 40K blog documenting our gaming adventures in the fantastical sci-fi universe of Games Workshop.
Categories: Battle Report (Narrative), Dar Sai Campaign

Another good report, great description and battle map. The Imperial Forces are taking a real beating I expect more from the Imperial Troops. The Tau really seem to have the upper hand and are just too much for the Imperial Troops to handle.
LikeLike