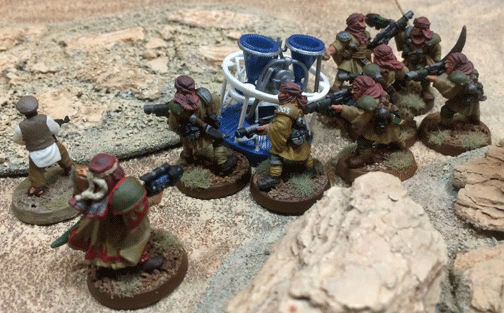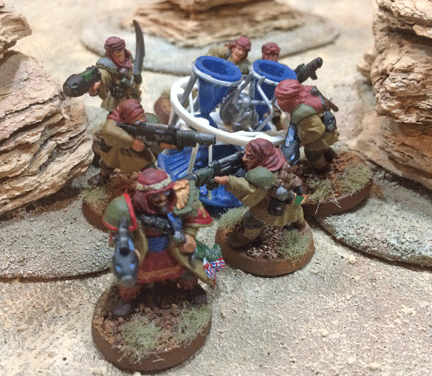
With the satellite array in his hands, Captain Arjin leads his men as they manhandle the objective to safety.
The satellite array was in his hands, and it was imperative to get it away from the approaching enemy. With the flat of his sword, Captain Arjin beat the backs of his men as they strained to lift the key technology and move it behind friendly lines.
“Faster! Faster!” he screamed above the roar of gunfire. “The Emperor is watching us.”
Imperial Turn Three
 Captain Arjin has no intention of losing his prize by getting locked into a fight. The infantry squads and command squad withdraw with the satellite component, while the weakened Bullgryn spread out, raise their shields, and prepare to delay the Plague Marines for as long as possible.
The Sentinel holds its position in the street, drawing cultists fire and preventing the heretics from chasing after the withdrawing Tallarn. The Sentinel’s multi-laser kills three cultists, while four more are killed by the heavy bolters on the sand dune.
The Bullgryns fire at the Obliterators, wounding one. Further south, the infantry troops on the gantry spot a Chaos squad advancing to support their Lord, and they target it. Three cultists are killed.
Spotting a mob of cultists trying to outflank the Sentinels from the north, the Wyvern targets the heretics and kills four. The cultists’ morale waivers and they fall back a few meters.
Finally, on the southern flank of the battle, the Tallarn continue to engage the frightening Chaos Lord. His immense size and power, along with the diseased fog that surrounds him, should be enough to doom the guardsmen, but they fight on. One of these heroic warriors falls to Havoc’s power sword.
Chaos Turn Three

The Chaos Lord, known as Havoc, advances through the village.
The traitors and heretics recognize that their attack has stalled. An attempt to flank the Tallarn from the north fails, as the Wyvern has dropped mortar fire on them, forcing the cultists to fall back. Meanwhile, the cultists in the buildings do not bother to chase after the withdrawing Imperial infantry. Instead, they target the squad with the satellite component and kill two.
That is not enough to force the guardsmen to drop their prize and flee.
The Plague Marines are the best opportunity for the traitors to complete their mission. But first they must deal with the Bullgryns to their front and flank. The traitor Astartes clamber over the wrecked Chimera and target the Bullgryns with their bolt pistols, but the abhumans raise their slab shields and block the deadly fire.
The Astartes then charge the huge abhumans. A furious melee ensues, and although one Bullgryn is wounded, the Bullgryns hold their ground and lock the traitors in melee, thus buying the withdrawing infantry even more time to escape.
To the south, Havoc bellows in frustration. He, too, wishes to advance, but the guardsmen to his front refuse to flee. They avoid all his deadly blows and keep him locked in melee.
Imperial Turn Four

The Chaos Lord’s plans are thwarted by a squad of Tallarn that sacrifices itself to delay the traitor Astartes.
The cultist threat is minimal, and the Sentinel turns south to support the Bullgryn in their melee. The giant abhumans bring down two Plague Marines, but one Bullgryn falls. But the screening force continues to hold, and the traitor Astartes are stymied in their desire to give chase to the satellite components.
The heavy bolter squad continues to sweep the streets with fire, killing three more cultists and driving the rest into cover.
The Wyvern turns its attention to the advancing cultist mob to the south—those who seek to support the Chaos Lord in his fight against the infantry. The vehicle’s Stormshard Mortars land directly atop the heretics and kill six. The mob of cultists flee.
The only success for Chaos is the fight between the Havoc and the few survivors of the heroic infantry squad. Finally,the Chaos Lord manages to strike down the last two survivors and clear his path forward.
Chaos Turn Four
 With the death of the stubborn infantry squad, the Chaos Lord finally can advance again. He moves north and charges the Engineer and his servitors, who are screening the southern flank of the withdrawing Imperial forces. The Tech Priest is killed quickly, but the servitors managed to stand their ground.
Once again, Chaos is being held up.
The cultists in the buildings target the retreating guardsmen and kill one more, although their refusal to come out of the town and chase the Imperials plays exactly into the plans of Captain Arjin.
The Plague Marines continue the fight with the Bullgryns, dragging down one abhuman and gutting him.
To the south, the Obliterators have cleared the village and target the troops on the gantry. They kill one guardsman.
Turns Five and Six

The Tallarn’s objective slips away from Chaos forces. Victory to the Imperium!
The battle is essentially over. The objective is moving to the relative safety of the table’s edge, and given the Imperial forces screening the withdrawing troops, Chaos has no serious opportunity to take back the objective.
Still, the fighting goes on. The sorcerer casts Gift of Contagion once again, sapping away at the strength of the Bullgryns, who are finally killed by the Plague Marines. More cultists are killed, many flee, and a few guardsmen on the gantry are wounded.
The sun begins to descend as the battle winds down. Captain Arjin has managed to withdraw with his objective secured, casualties are relatively light, and three Plague Marines have been struck down.
There is some cause for celebration for the Imperials.
Imperial Victory Points: Control of objective (3 v.p.)
Chaos Victory Points: First blood (1 v.p.)
Imperial Victory!
Click here to read the battle’s start.
TheGM: This was a solo game and, as is so often the case, I find I tend to favor one side as I make my tactical decisions.
The plan to rush forward with the Chimera to block access to the satellite component was a good one and, without any fast troops on the Chaos side, the tactic gave the Imperial troops a solid advantage early in the game.
Chaos forces were not aggressive enough. The cultists should have ran the gauntlet (the heavy bolters) and chased the troops with the objective. Still, the Bullgryns proved a formidable obstacle, and the heroic stand of the infantry squad facing the Aspiring Champion was game-changing.
The terrain worked against Chaos, too. It was too tempting for my best units (sorcerer, Obliterators) to use the terrain for cover, but it also terribly limited their firepower. If they’d been better positioned, they might have targeted the units attempting to move the objective and forced them to drop it.
That would have it possible for Chaos to advance and take possession before the final turn.
Ah, well. It was a good fight, and the narrative was great. In my mind, I really can see Captain Arjin facing a desperate opponent and using maneuver to win the day.
—
The Corvus Cluster is a Warhammer 40K blog documenting our gaming adventures in the fantastical sci-fi universe of Games Workshop.
Categories: Battle Report (Tabletop), Chaos, Dozaria Campaign

Great work as always. I love it when Corvus Cluster updates pop up in my reader!
LikeLike
Nice report, and the way you do your maps reminds me of those classic White Dwarf battle reports of the 90s. Great stuff!
LikeLike