IMPERIAL TURN THREE
 Imperial forces continued to advance through the town on the west flank. Imperial fire was largely ineffective, although two Tau fire warriors were killed in the northern parts of town by Beta Squad.
Pulling away from its infantry support, the Scout Sentinels turned east to outflank the Piranhas that had targeted the Hellhound. As they ran to their new position, they were unable to fire.
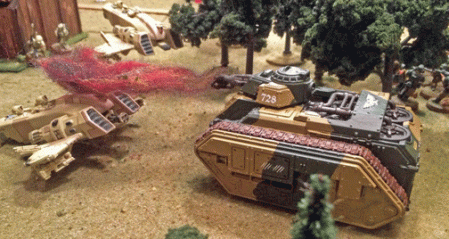
The Hellhound, having destroyed one Piranha, targeted a second and caused a glancing hit, immobilizing it and stunning the crew.
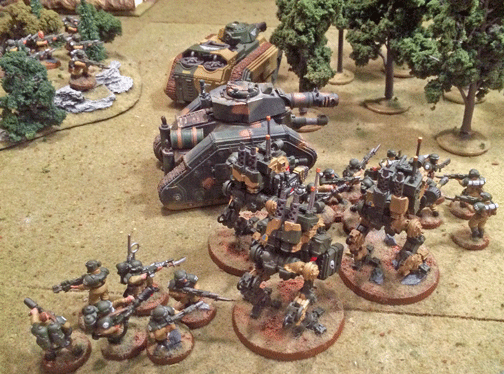
To the east, the Lemon Russ tanks, Armored Sentinels, and support troops advanced forward, targeting the Tau’s Broadside Suit. Shell after shell struck the xeno walker, whose shields deflected hit after hit, but finally the xeno was overwhelmed by the intensive rate of fire and destroyed.
On the right flank, the flamer-equipped Chimera continued to move toward the Kroot in the woods, forcing them to withdraw deeper into the forest.
TAU TURN THREE
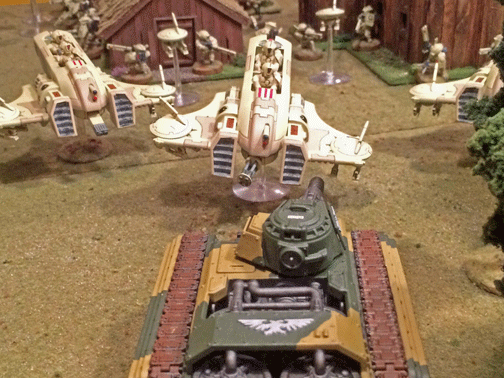
Finally breaking through the Imperial air cover, the rest of the Tau reserves landed behind Imperial lines. A Crisis Suit team armed with fusion blasters landed behind a Lemon Russ tank and destroyed it.
A second team armed with a mix of weapons landed on the edge of the battlefield and targeted the 2nd Special Weapons Squad but failed to cause casualties.
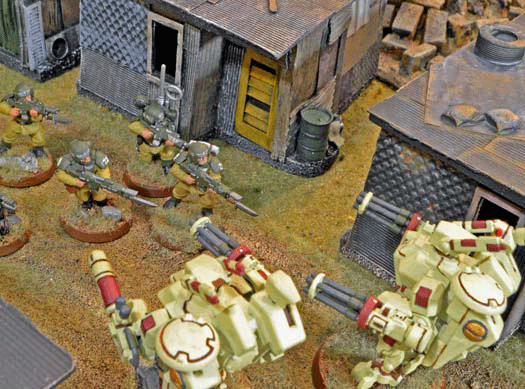
The Crisis Suits with burst cannon opted to target Beta Squad on the wooded hill. Along with fire warriors shooting from the buildings to the north, three guardsmen were killed and the squad routed.
The Kroot on the western flank managed to kill two guardsmen of Alpha Squad and also rout that squad.
IMPERIAL TURN FOUR
 On the western flank, Imperial fire again was largely ineffective, although the 2nd Special Weapons Squad used flamers to kill the final Stealth Suit. Alpha Squad regrouped in the town.
The Hellhound turned and targeted the Crisis Suits, wounding two. One was finally brought down by fire from Beta Squad.
With the Broadside Suit eliminated, the Armored Sentinels reversed course and advanced on the Crisis Suits. Meanwhile, the remaining Imperial armor moved forward.
TAU TURN FOUR
Landing in the middle of Imperial forces was effective for a turn, but with the element of surprise lost, Imperial forces quickly responded by bringing overwhelming fire to bear. To regain the initiative, the Tau sought to do as much damage as possible before the Imperial fire began to make itself felt.
At the western edge of the battlefield, the two-member Crisis Suit team targeted the 2nd Special Weapons Squad and killed two—then the team used its jet packs to withdraw into the cover of town. One Crisis Suit took damage as it landed amidst the debris of the streets.
The surviving members of the Crisis Suit team with burst cannon moved north, targeting the platoon command squad and killing two guardsmen. The squad routed.
The Crisis Suit team with fusion blasters—along with the surviving Piranha—targeted the Hellhound but failed to damage it.
On the eastern flank, a Devilish transporting a fire warrior team left the woods to threaten the Chimera heading toward the Kroot—and hopefully distract some of the Imperial armor that might otherwise move to address the threat of the Crisis Suits.
IMPERIAL TURN FIVE
 On the western flank, Alpha Squad targeted the adjacent Crisis Suits, but the urban terrain allowed the xeno to survive the fire.
Nearby the Hellhound targeted the Crisis Suits but failed to do any harm with its turreted Inferno Cannon. The 4th Special Weapons Squad, supported by the Armored Sentinels, managed to kill another Crisis Suit.
Beta Squad failed to rally and continue its rout.
In the center of the battlefield, the Chimera with multi-laser raced forward. While the vehicle had waited too long, there was a chance the game would continue extra turns, and the transport might manage to bring its embarked Veterans forward to contest one of the Tau objectives.
Farther to the east, the second Chimera moved to the edge of the forest to contain the Kroot.
TAU TURN FIVE
Recognizing that the Tau had played too defensive a game, the xenos sought to consolidate whatever victory points it could acquire.
The Tau had hoped, with one Crisis Suit next to an Imperial objective, it had seized its victory points—only to realize that, as an elite unit, the Crisis Suit could not do so. Still, it could contest the objective.
The Devilfish in the center moved to block the advancing Chimera. If the game went another turn, the Tau wanted to stop the Imperium from threatening one of its objectives.
Further offensive action would essentially not change the result of the battle, so the Tau contented themselves with targeting the Hellhound for destruction—but the vehicle’s heavy armor stood against all threats.
The Tau Pathfinders movde to the second Tau objective, hoping to secure it—and forgetting that, as an elite unit, it could not do so. This oversight, twice made in the same game, sealed the Tau’s failure to seize Pradeep.
FINAL RESULT
Tau: One objective worth 3 victory points, plus Linebreaker (1 v.p.), Slay the Warlord (1 v.p.), destroyed one heavy support unit (1 v.p.) = 6 v.p.
Imperial: One objective worth 3 victory points, plus Slay the Warlord (1 v.p.), First Blood (1 v.p.), destroyed two heavy support units (2 v.p.) = 7 v.p.
Imperial victory, allowing the Imperium to retain control of Pradeep.
TheGM: In many ways, this was a battle of poor tactical play and grievous mistakes. Thankfully, the result did not affect the strategic outcome of Dar Sai.
Playing both sides, it’s not surprising that my conservative play dominated the game. I was overly afraid of each side’s firepower.
The Imperium failed to to be aggressive with its armor superiority—a mistake all the more outrageous once the Tau Hammerhead was destroyed on Turn Two.
The Imperial commander also made a terrible mistake in not properly deploying so that the Tau Stealth Suits couldn’t infiltrate—a huge mistake.
Finally, given that the Imperium had two Chimeras with Veterans embarked, it is unforgivable that no attempt was made to charge the Tau deployment zone until Turn Four. An objective could easily have been contested, or at least a victory point could have been earned for Linebreaker.
On the Tau side, there also were key mistakes. It was a huge mistake to forget that Crisis Suits are elite units and cannot seize objectives. It also was a mistake—the turn after landing—for the Crisis Suits to stand their ground against half the Imperial army. There’s a reason why troops with jetpacks can shoot—and then run like hell.
The Crisis Suits should have used their maneuverability to draw Imperial troops in the direction they wanted—or hide and distract the Imperial commander.
Finally, the Tau had two Devilfish with troops aboard, and they also made no attempt to challenge an Imperial objective—nor did they seek to enter the Imperial deployment zone. A more stupid mistake was that the second objective in the Tau deployment zone was not controlled—there is simply no excuse for that. It was an oversight that cost the Tau the ame.
I almost wish I could forget this battle ever was fought …
Click here to return to the beginning of this battle.
—
The Corvus Cluster is a Warhammer 40K blog documenting our wargaming adventures in the fantastical universe of Games Workshop.
Categories: Battle Report (Tabletop), Dar Sai Campaign


