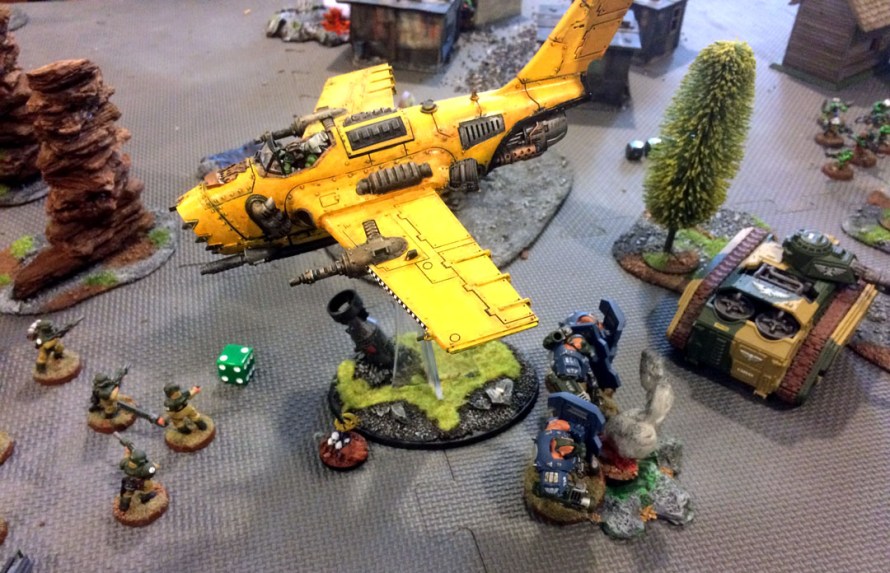
Ork fighta-bombas operated freely over Imperial lines, disorganizing and demoralizing troops. Thankfully, their abysmal accuracy of fire was one small consolation to Imperial commanders.
This fighting took on a new intensity as the sun rose over the horizon, with the superior Imperial fire finally beginning to pay dividends. As the ork attack on the center broke from cover, the Imperial firing line immobilized battlewagon after battlewagon, forcing the orks to dismount and use the wrecks as cover.
On the left flank, the Imperial armor tried to regain its momentum, but the ork commander continued to launch a series of small but distracting counterattacks

Ork battle wagons on the Imperial right flank swing past the mechanized stormtroopers and roll up part of the Imperial center–just as the main ork force brings its full weight to the battle.
On the far right flank of the Imperial line, a powerful force of orks simply ignored the stormtroopers in front of them and swung toward the center of the Imperial lines. Despite the death of hundreds of xenos, hundreds more slammed into the Imperial center and crushed it. Within minutes, panicked Guardsmen were running for their lives. Even the regiment’s commissars, who were executing retreating troops as an example, could not stop the rout.
Hastily, Col. Klein sought to redeploy his infantry on the left flank and bolster the collapsing center. This effort almost failed. The ork advance was rapid, and fleeing Imperial troops stymied the work of officers to form up a new line of defense. Also hampering efforts was a series of strafing runs by ork fighter aircraft, which disorganized the movement of reinforcements to the front and, because the air attacks went unanswered, undermined troop morale.
At this point, it was clear that the flank attack by Imperial armor would not succeed, and Col. Klein ordered it to turn and support what remained of the Imperial center. That proved critical, as the ork warlord—accompanied by Killa Kans and a vanguard of huge Ork Boyz—aimed its advance directly at this still-intact part of the Imperial line. It was as if the xeno realized that this was the last remaining obstacle to his victory.
At this point, with dusk approaching, the ork counterattack reached its height. But the orks were in open terrain, and with sufficient light still on the battlefield, the xenos were met by the desperate volleys of exhausted Imperial troops, supported by cannon fire as Imperial armor began to join the line.

The orks make a final all-out attack on the Imperial line. Often overlooked in Imperial records, the mechanized stormtroopers on the right flank made a bold move to seize a xeno ammo dump but were thrown back by ork reserves.
The roar of lasgun and cannon fire was so great that blood was seen pouring from the ears of some troopers, who emptied their ammunition into the advancing xenos. Slowly, one by one, the immense xeno warriors fell.
One of the last to fall was the ork warlord, a 2.5-meter-tall beast who managed to reach the Imperial lines and slaughter two dozen troopers in murderous hand-to-hand combat before finally succumbing. Battle-crazed troopers continued to hack at the warlord’s corpse until it was torn to pieces.
With the fall of their warlord, the few surviving orks appeared to lose heart and withdrew, and as darkness fell on a long and bloody day, the 728th Cadians held the field.
That was little consolation for Col. Klein. Imperial casualties were immense, and xeno reinforcements were certain to arrive, as orks are drawn to battle like moths to a flame. What’s more, he realized, the regiment lacked the number of able-bodied troopers to hold both the mine complex and the lengthy supply line necessary to hold onto his prize.

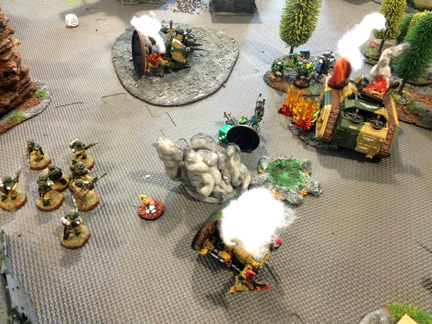
The ork warlord and his Killa Kan fall as they attempt to seize an objective marker in the middle of the Imperial line. Even contesting the objective would have given the orks the victory. As you can see, death and destruction littered the battlefield.
Confronted with an unsustainable tactical position, Col. Klein reluctantly ordered a withdrawal back across the desert to the relative safety of the Imperial lines in the Iron spires.
The liberation of the Z’yra Mines would have to wait for another day.
Victory Results: Tie
Imperial: 2 V.P. for objectives, 1 V.P for Kill the Warlord,
Ork: 2 V.P. for objectives, 1 V.P. for First Blood
TheGM: Forced to deploy first, I spread my forces across the table to cover any eventuality, hoping that I could consolidate if The Gaffer’s deployment threatened to severely overwhelm one flank.
When it became clear the orks had concentrated on my right flank, I decided to trust that flank could withdraw to the center—and I chose to send the armored left flank to swing around the weakened ork right flank—and hopefully put myself behind enemy lines.
Alas, abysmal firing by my armor led me to waste a turn marked by indecision and caution, and along with the skillful handling by The Gaffer of his limited troops on that flank, prevented my flanking attack from gaining momentum. Thus my armor was in position to stabilize the center late in the game—and prevent a defeat—but the armor did not have the impact it should have had.
Given that I had little to lose (on the attack, you don’t lose territory), I should have charged boldly. If my armor had been lost to a lucky ork fire, the strategic result of the battle would have been no different. This was the battle to be bold–and I didn’t realize it until the post-battle analysis.
Click here to return to the battle’s beginning.
Categories: Battle Report (Narrative), Hegira Campaign
