
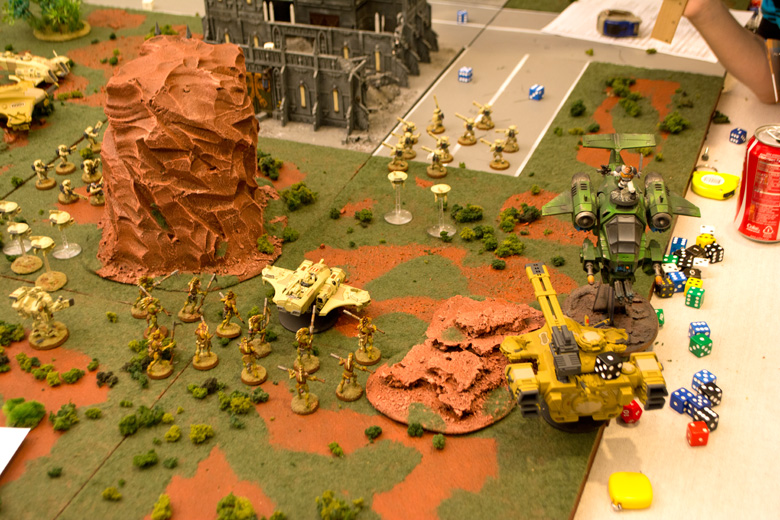
My Martian tiles are designed to provide a somewhat unworldly venue for Warhammer 40K battles.
Like any form of creativity, a narrative campaign can sometimes take you in directions you never intended. So when the description of Hegira referred to a Mars-like surface–and I was thinking of adding some new terrain tiles for my game room–the idea of creating some “alien” terrain proved irresistible.
SIZES AND MATERIALS
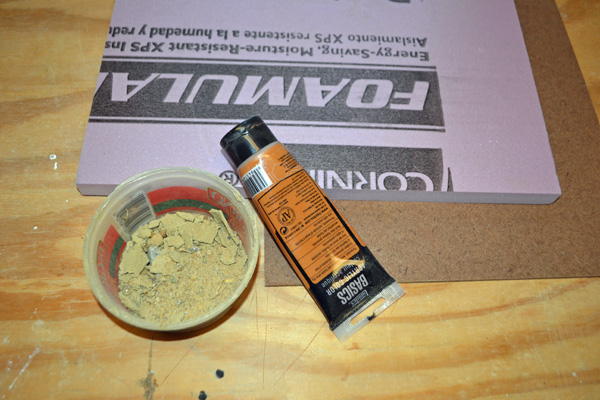
The raw materials of my Martian tiles: MDF board, polyurethane foam (insulation board), sand, and acrylic paint. The only thing missing is Elmer’s glue.
My original design also had an eye to creating future City of Death scenarios, so I imagined a layout of city blocks with streets between them. So I sized my terrain accordingly for my five-foot-wide game table.
A basic tile of 15-inch square would be used for a city block, section of building, or open terrain. Road tiles would be 15 inches by 7.5 inches.
The materials were pretty standard: A 3/4-inch-thick slab of polyurethane foam (insulation board) glued to a 3/4-inch-thick MDF base. This made for a very solid base that was unlikely to warp.
One exception to this standard would be building tiles. These tiles would include another 3/8-inch-thick MDF board on top of the insulation foam. This extra layer of MDF would be engraved along the edges to represent sidewalks, and the extra thickness of this MDF board would raise the sidewalk above that of the road tiles.
In time, other tiles may be added of different sizes for specific terrain features. For example, for a large space of open terrain, I could add some 20-inch-square tiles–three across would span my five-foot table.
Or I might do a 30-inch-square tile for a cathedral or large factory.
All materials are glued together with basic white glue.
FOAM PROTECTION
To provide a hardened shell to the insulation foam and strengthen the durability of each tile, I’ve covered each tile with Foam Coat from the Hot Wire Foam Factory.
This hasn’t proven entirely satisfactory. The material is gritty–reminding me a great deal of dental cement–and is better suited for covering foam that represents rocks or masonry work. It isn’t the best option for the smooth sides of tiles.
Two better options, I believe: I’m going to try the Foam Factory’s Styroplast, similar to an epoxy that you brush on. That’ll leave a smoother coating. One tip I’ve heard about its use: It tends to fill in shallow grooves or engravings, so you either need to brush out these indentations in your foam or engrave a bit deeper.
Another option is Future floor wax. This creates a hard if glossy surface that can be dulled with Testor’s Dull-Cote.
THE GROUNDWORK
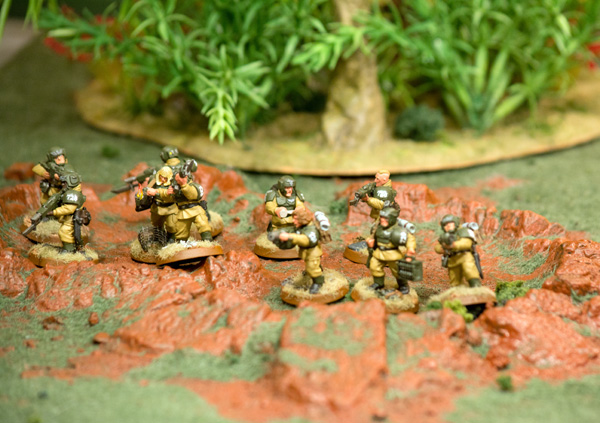
This crater tile shows the intense dark red soil and dark green vegetation that marks my alien planets.
Once that prep work was done, I covered the surface of the open ground tiles with white glue and then sprinkled on sand and model railroad ballast.
Now it was time to paint the “soil.” This gave me some problems. I’m no artist and have no eye for color. I experimented with a variety of orange and red paints. One of my favorites was a spooky dark red; another a rusty orange. Both had their advantages, but a big problem for me was finding a lighter shade of each color for drybrushing the uneven ground. I just could not find the right shades.
In the end, I opted for the deeper, darker red. I painted the tiles using Liquitex’s “Basics” line of acrylic paints. I started with a base of Black paint, followed by Burnt Sienna. That was followed by a heavy drybrush of Red Oxide. After that, I followed up with a mix of Red Oxide and White as a final light coat to highlight the edges of rocks.
FLOCKING
I’m always tempted to put in a lot of details in my terrain. But, after some reflection, I realized I needed to keep my first tiles–my base tiles–free of much detail, so I had maximum flexibility for putting down scenery or buildings. So I put aside the temptation to put down a sizable amount of flocking and small bushes, and just went with a thin coat of flocking.
The first step was to cover each tile with watered-down glue and then apply Woodland Scenics static grass.
As the flocking was supposed to represent an off-worldly planet, I used Dark Green. It contrasts very starkly with the raw sienna of the soil.
Finally, I sprayed on a coat of Woodland Scenics’ liquid glue, Scenic Cement. I can’t speak highly enough about this product. It dries with almost no glossy sheen, and it holds down flocking very well. You’d need sandpaper to get it off, which means your grass will be very durable.
ROADS
I can foresee the need for a number of specialty road tiles, but as a first step, I stuck with separate and very basic modern roads. I opted for a conservative approach and painted them a basic gray color, and using painter’s tape, laid out some traffic lines and spray painted the areas with a light coating of off-white.
After it dried, I laid down a line of dark wash over each “lane” to represent the accumulated leaks of oil and lubricants that stain any heavily traveled modern road. A light coating of Testors’ Dull-Cote provided a final protective coating.
These tiles still need work. They’re too “perfect.” A bit more wash, maybe some debris, would make them fit the always-at-war theme of 40K
BUILDINGS
I’ve written a separate blog about my buildings. The main point to remember is that I add an extra sheet of MDF on top of the foam to create the “sidewalk” that rises above the streets or surrounding terrain.
BUTTES AND ROCKS
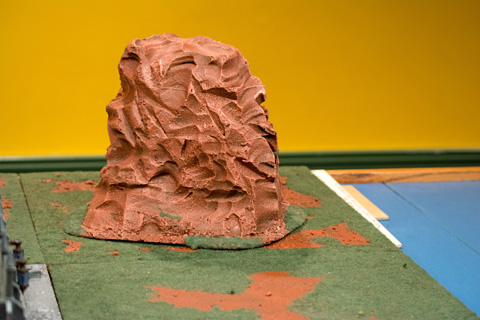
One of the features of my Mars tiles is wind-eroded buttes and mesas.
This was a simple project. I glued three eight-inch-by-eight-inch sheets of two-inch-thick insulation board together using Foam Fusion, a glue by the Hot Wire Foam Factory that is more easily cut through by a hot wire. This was then glued down on a piece of MDF board.
Once dry, I used my hot wire tool to carve the foam to the appropriate shape. Just as with the ground tiles, a base coat of Black was followed by Burnt Sienna, followed by Red Oxide, and finally a highlight of Red Oxide and White.
After that, I glued down a few patches of dark green flocking around the base.
I also tore up a few pieces of cork and glued them to MDF board, which I also painted. These represent small rock outcroppings and should provide some handy cover for my troops.
THE FUTURE?
As is often the case, I have mixed feelings about the results. The buildings and streets look too modular–too perfect–for my taste.
At some point, I’m going to want to make some nicer Earth-like tiles, so I’m not certain how ambitious I’ll get with the Mars tiles.
I suspect the modern roads will look better if cover with debris, and if they are surrounded by buildings. An urban area is a bit more sharp-angled. For more rural roads, I probably need to build some tiles with built-in roads, so the roads blend in a bit better with the surrounding terrain.
For all that, I think I’ll stick to this format as I develop my City of Death tiles. I hope eventually to have enough tiles for a five-foot-by-ten-foot city. That’s a lot of building kits, however, so I’ll probably work on this ambitious project on an ad hoc basis.
I am thinking of a few canal tiles. For those, I’m thinking to glue insulation board to the edges of the MDF board, leaving a bare patch of MDF in the center for the water channel. That I’ll a sickly green, then pour in Woodland Scenics’ Realistic Water mixed with a bit of green paint to represent the water. I might toss a few junk bitz into the water to give it that nice Imperial-exploitation-of-the-environment effect.
Ah, so many projects, so little time.
Categories: Terrain

Thanks ffor a great read
LikeLike