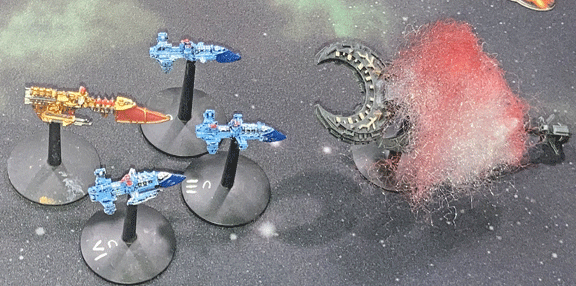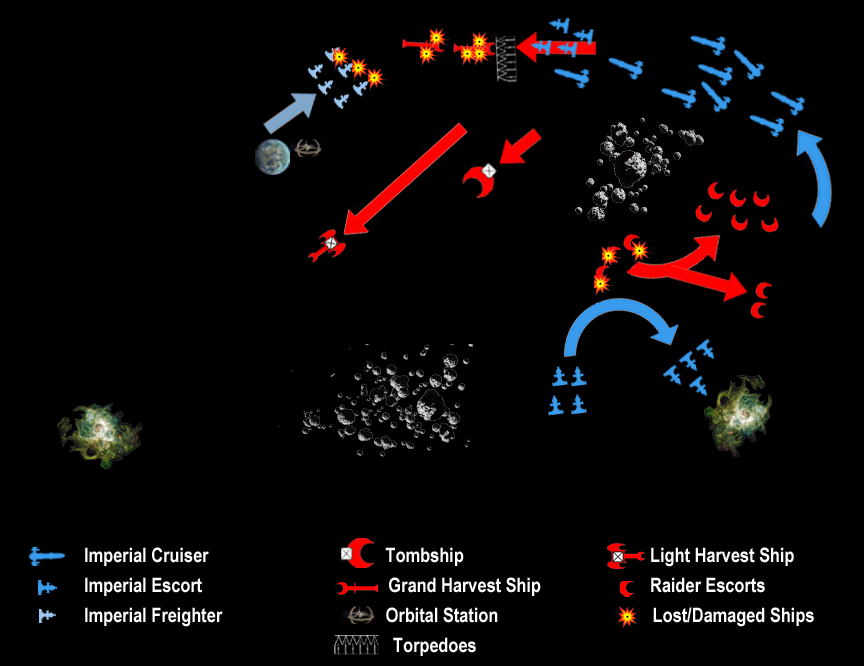
The Imperials maneuver perfectly into the rear of the crippled Tombship and open fire with the full weight of their fleet. The Tombship is soon on the verge of destruction, only one hit away from turning into a dead hulk.
“Planning a battle strategy is an essential factor in gaining victory, but don’t expect your strategy to survive the confusion of battle. —Rear Admiral Zyphros after the 2nd Battle of Melanoe Naval Base
* * *
Turn Six
Zyphros is aware the Necrons are chewing up his escorts to the rear, but with the Tombship gone and the xenos’ cruisers poorly positioned to his front, he opts for an aggressive pursuit.
Still, several cruisers, as they chase the Necron fleet, maneuver slightly for a broadside against the Dirge-class Raiders to their rear. They fire, and along with a wave of torpedoes by the Cobra destroyers still operative, they manage to destroy two of the small xeno ships.
 Thousands of miles away, a squadron of civilian transport ships, left behind to guard the naval base, see the approach of the xeno cruisers. They are ordered to block this attack.
They move forward, knowing they are grossly outgunned, but still they challenge the xenos with long-range, yet ultimately futile fire.
The captain of the Khopesh-class light cruiser orders “All Ahead Full” and races ahead of the pursuing Imperial fleet, but the two Harvest ships are not so lucky. The ancient circuitry of their eons-old ships are stressed by the speed and maneuvering of the past few hours, and their captains cannot eke out the power to escape the Imperial fleet.
They run as best they can, constantly under fire by the enemy ships closing on them.
The Necron Dirge-class Raiders see the writing on the wall. They accelerate right past the Imperial excorts, killing one Corbra-class destroyer before racing into the emptiness of space.
The Jackals, however, see an opportunity to make a last attack. They turn toward the rear of the Imperial fleet, but they are firing at long range and no damage is done.

Although pitifully weak, Imperial civilian freighters leave the safety of the naval base and accelerate to challenge the approaching xeno fleet.
Turn Seven
At the beginning of the battle, Zyphros had harbored doubts about facing the technologically advance xenos. But his battle plan is working far better than that of his opponent, and he pushes his capital ships to close with the Harvest Ships and strike a deadly blow.
On the other side of the asteroid field, the surviving Cobras that attacked the xeno escorts make an emergency turn to follow the Jackals. Alas, the xeno ships are too fast and race out of range.
The Jackals manage to bring the trailing cruisers under long-range fire, but no serious damage is done.
With the Imperial fleet nipping at their heels, the xeno Harvest Ships cannot return fire, so they accelerate as best they can. The civilian freighters are approaching to their front, so the Harvest Ships open fire and destroy three ships.
The remainder freighters break formation and scatter in a panic.

As the Tombship flees the battle, the Imperial fleet approaches two Harvest Ships from the rear. Unable to defend themselves, the two cruiser-class warships begin to take heavy damage.
Turn Eight
The Necron cruisers’ acceleration offers no respite, and the Imperial fleet has a dominant tactical advantage.
The Cobras fire torpedoes, a light cruiser fires a lance shot, and four more cruisers fire their prow weapons, and the trailing Harvest Ship is battered. It has only one hull point left, and its engines are slowed to half speed.
The leading Harvest Ship also takes three hits of damage and finds itself also in grave danger of being crippled and caught.
Meanwhile, the Jackals discover their aggressive tactics are poorly planned. Two Imperial cruisers that are too-far away to fire on the Harvest Ships see the xeno escorts approaching, and they turn their port weapons batters in their direction.
A dozen dice are thrown, and lots of sixes rolled. Five of the six Jackals explode in a ball of flame.
At this point, the cybernetic xenos have had enough. All remaining Necron ships “phase out.” Victory belongs to the Imperium!

The Harvest Ships, with the entire Imperial fleet to stern, fight their way past the Imperial civilian freighters and flee the star system. So, too, do the Tombship, Koptek light cruiser, and the few surviving xeno escort ships.
Post-Battle Results:
The Imperial lost half its escorts and saw damage to two cruisers. The Necrons see three of their largest ships severely damaged, and they are only saved because their xeno technology allows them to flee a battle at will. Losses among xeno excorts are high.
Imperial Victory Points: Two xeno vessels crippled and disengaged (225 v.p.) + Cruiser-class vessel disengages (40 v.p.) + seven escorts destroyed (320 v.p.) = 585 v.p.
Necron Victory Points: One escort squadron destroyed (350 v.p.)
585 Imperial v.p. versus 350 Necron v.p. = Solid Victory for Imperials!
—
TheGM: Recently, at a convention flea market, I obtained an entire Necron fleet for Battlefield Gothic. So been I’ve itching to put these ships to the test and get “something going” in the Dryillian Quarantine Zone.
This was a solo game, and I couldn’t tell what would happen. The Necrons are pretty tough, but they’re also expensive. So it was quality versus quantity.
As the Imperials set up first, I thought I could swing the Necrons behind the Imperials using the order “All Ahead Full.” But I should have rolled for the Tomb ship first instead of last. When it failed, the rest of the Necron fleet was out of position to help their biggest ship.
Of course, the Necrons are tough, and it took several turns to whittle away at the Tombship. Thank goodness the rest of the Necron cruisers were poorly positioned, and the asteroid field gave them no room to turn around and support their flagship.
I was a bit worried when the Necron escorts took out my Firestorm frigate squadron with one volley, but, once the Tombship disengaged and then the Harvest Ships failed to shake the Imperial fleet on their tail, I was firing up their backsides and it was obvious the battle was going the Imperium’s way.
This was a fun fight. I tried to follow each admiral’s plan as best I could, and while it wasn’t decided entirely by the dice, some key rolls, at a critical moment, really shifted the odds.
Click here to return to Part 1 of this battle.
—
The Corvus Cluster is a Warhammer 40K blog documenting our gaming adventures in the fantastical sci-fi universe of Games Workshop.
Categories: Naval Battles

Exciting stuff! Makes me want to print up some ships and give BFG another shot.
LikeLike